
Here, we have gathered some of the best easy nail designs for you so as you can be part of the latest trend regardless of your skills and creativity.
Originally posted by pinterest
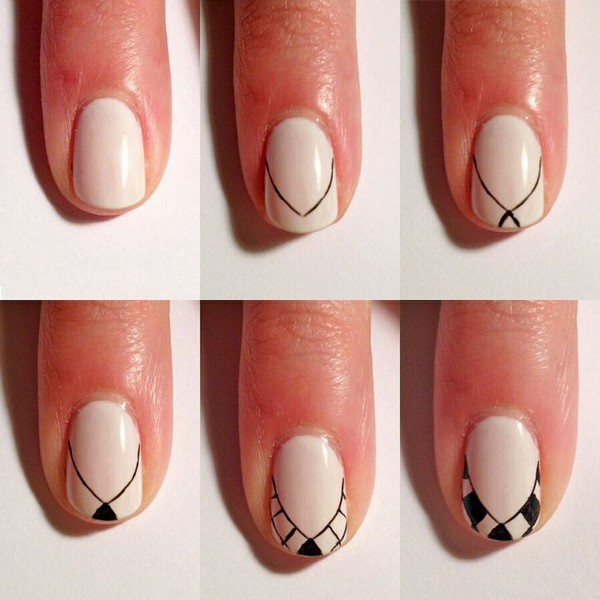
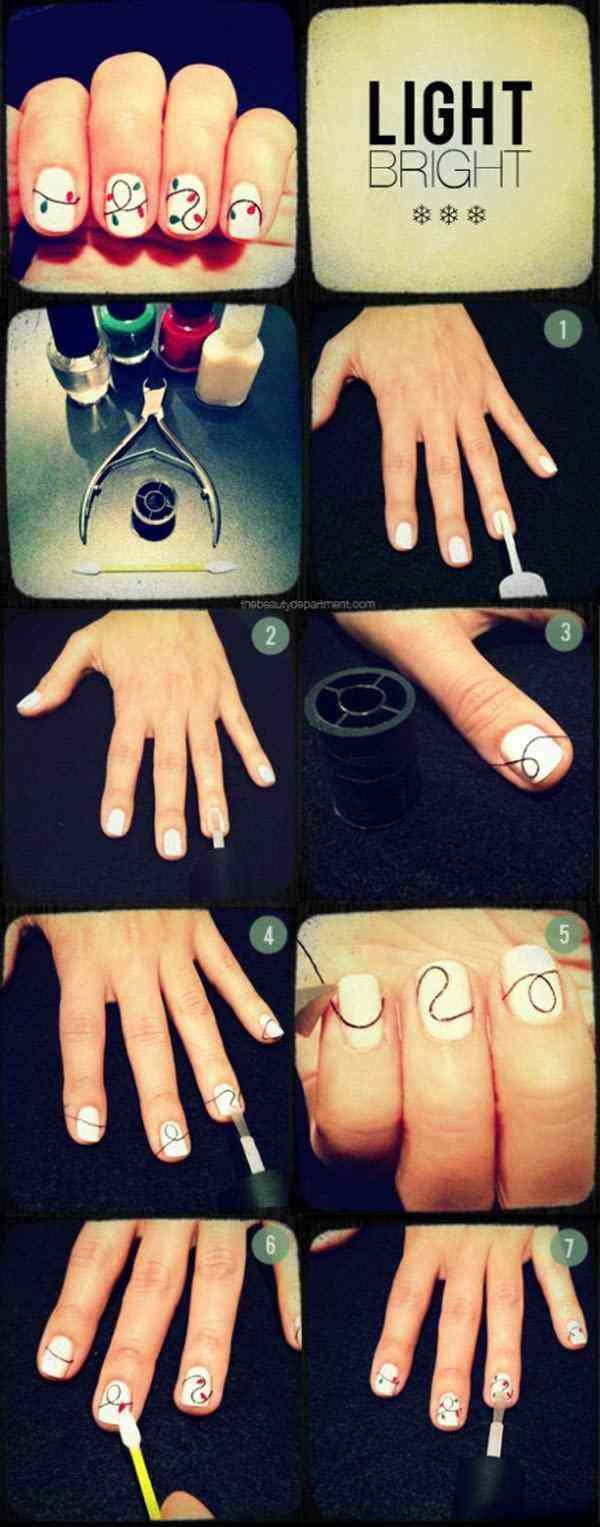
First, apply the base coat then use a pointed marker to draw the design.
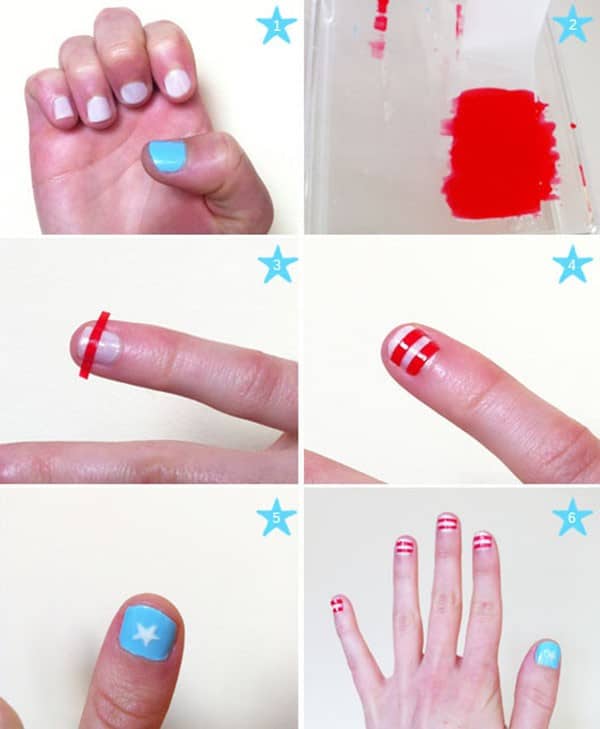
Apply white color on the four fingers and a blue color on the thumb finger. Paint a red color on the tape and cut it in strips and stick two strips in each finger. On the middle of the thumb, paint a little star using a white nail polish. Finally, top it off using a clear coat polish.

Originally posted by diyncrafts
Use your shearing scissors in cutting the zig-zag or scalloped pattern on the scotch tape. First, apply a green color on the nails, then let it dry. Stick the tape on the nails and apply the second color.
Originally posted by buzzfeed
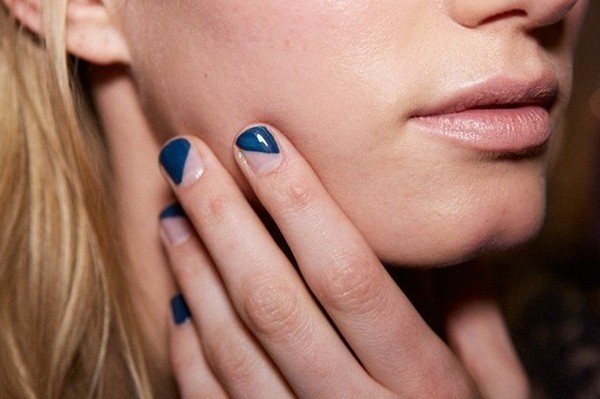
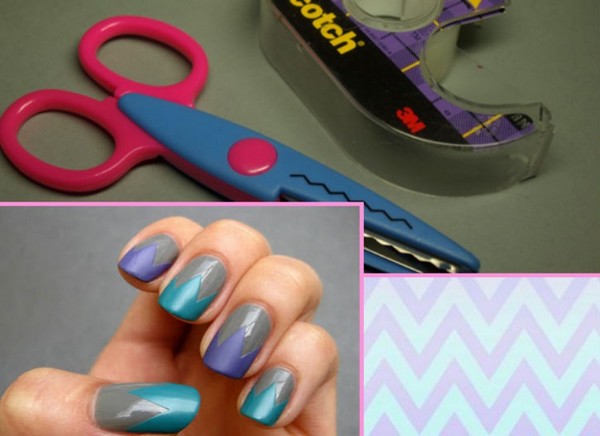
Apply a dark red nail polish on all the nails. With the use of scotch tape, create a chevron shape on the nails. Then apply a vibrant blue polish and let it dry. Stick two pieces of scotch tape on the base of the nails to form a triangle. Apply a white nail polish on it. Remove the scotch tape and apply a topcoat.
SSCS
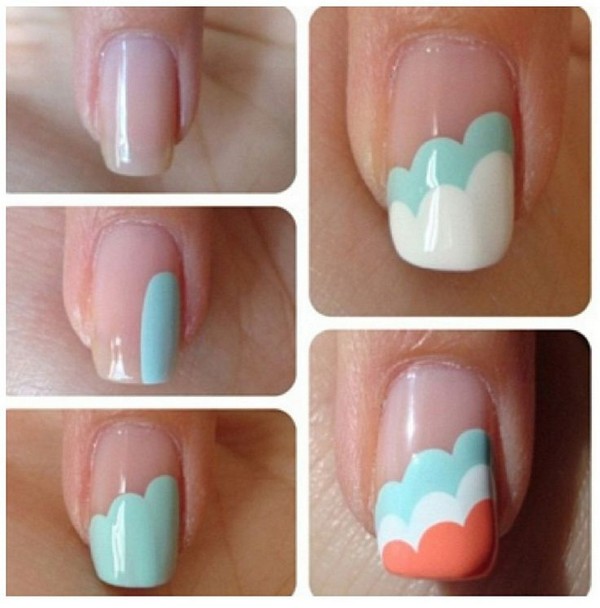
Draw the first layer of your clouds using a light mint green polish. Use the white polish as your second color then finally the red color.
Originally posted by minq
This is for people who want to have a minimalistic design on their nails. Get a tape and place it diagonally on your nail then paint a black color. Remove the tape and let it dry.
Originally posted by minq
Be creative in applying the tape on your nails. After the base coat has dried up, place the strips of tape into the nails. Apply the topcoat and enjoy having this amazing design.

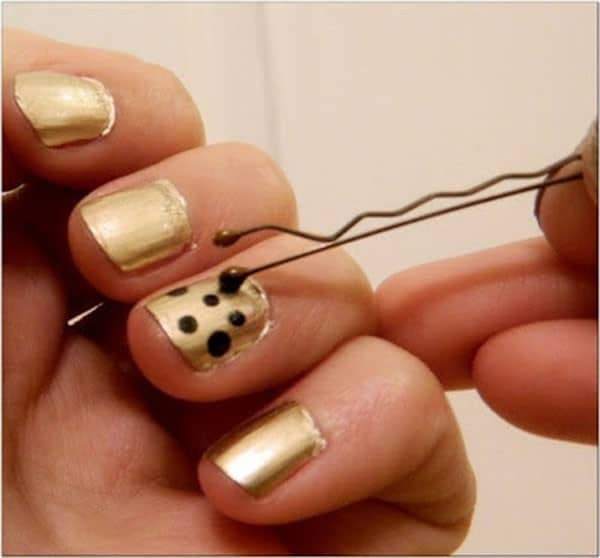
Apply your base coat then use a Bobbi pin to form the red circles. Also, apply some green color on the sides of the red circles to complete the design.
Originally posted by minq
Applying dots should not be stressful. You just need a bobby pin and simply dip its round tip on the nail polish. Then start making the dots and you’re done.
Originally posted by minq
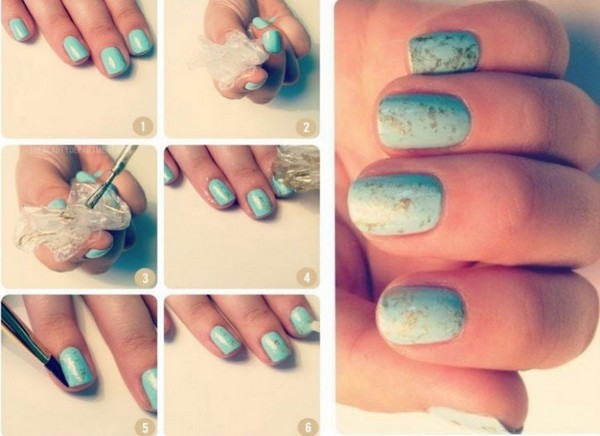
Making your nails look like precious stones can be done by using a crumpled plastic. Paint a metallic color on the crumpled plastic and dab it to your nails.
Originally posted by minq
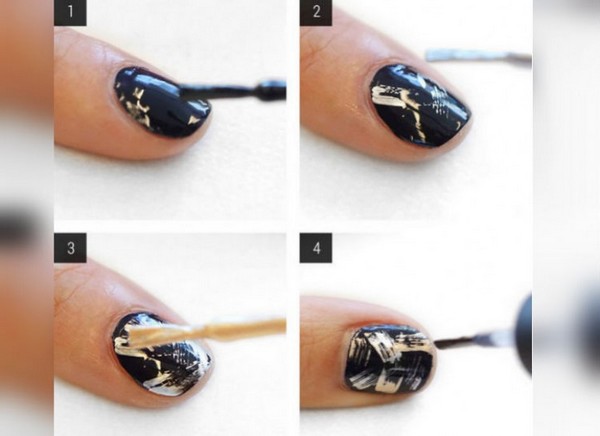
Begin by using a dark base coat. After that, add a little silver and gold paint. You must also wipe the metallic paints carefully on top of the bottle. This is to ensure that the bristles are visible upon applying it to the nails.
Originally posted by minq
Use the patterned scissors in creating those amazing edges on your nails. Cut a piece of tape with the use of a patterned scissors. Next, attach this tape into your nails and paint it.
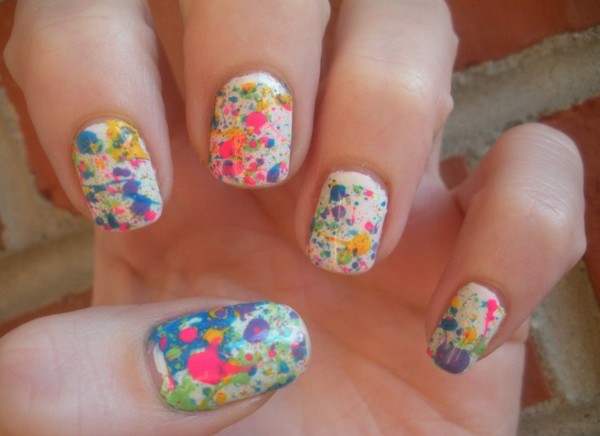
Getting this splatter design can be done easily with the use of a straw. First, apply a base coat on the nails. With the use of a tape, cover the whole area of the nails. Get a straw and splatter various colors on the nails and it’s done.
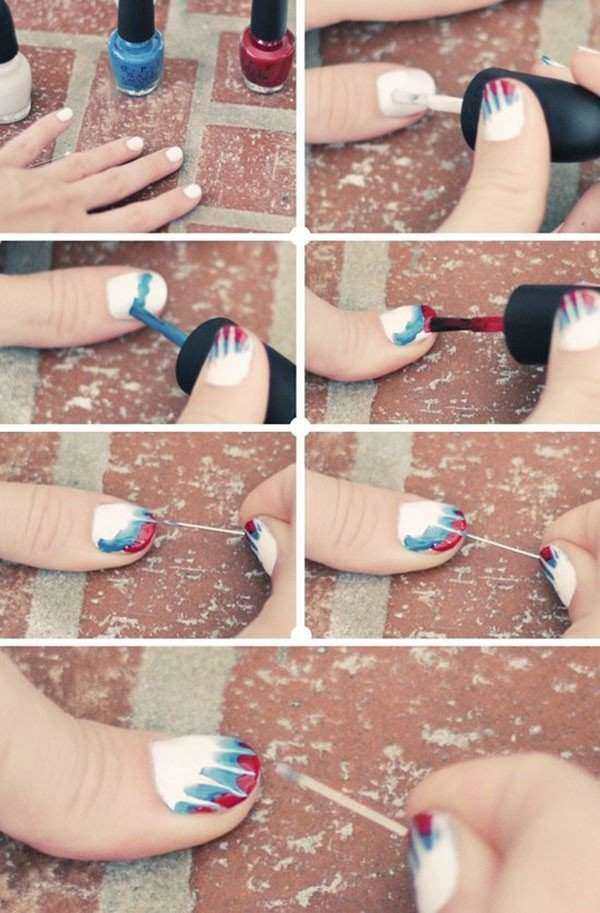
Paint your nails with white then let it dry. Draw a diagonal line using the blue and red polish. Use a toothpick and spread the white polish until it reaches the top portion of the nails.
Originally posted by minq
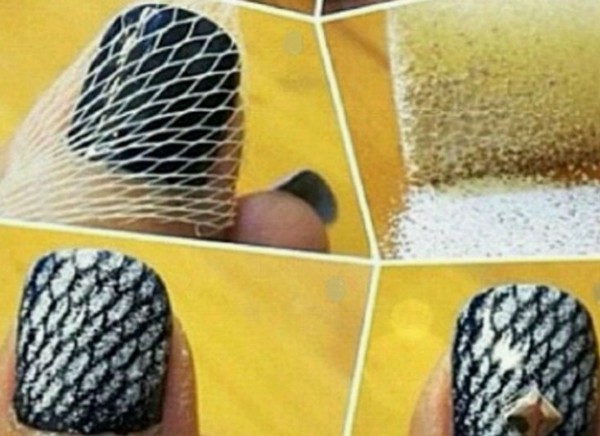
The fishnet nail design can be achieved with the use of a loofah. First, paint your nails with one color. Next, place a loofah over your nails and paint it again. This time, use another color of nail polish.
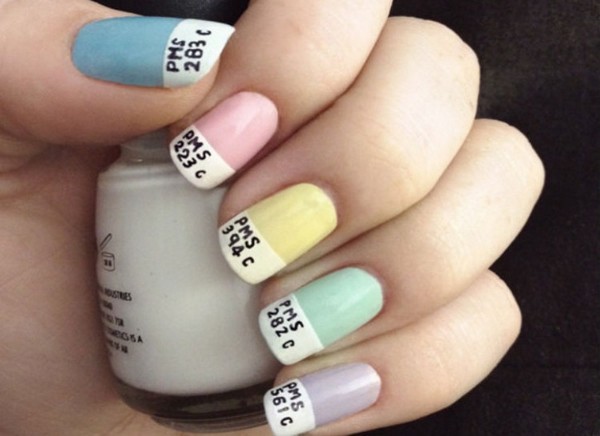
This design will let people know what color you are wearing. The tip of the nails is painted with white. A thin marker is being used in the writings on the nails.
Originally posted by minq
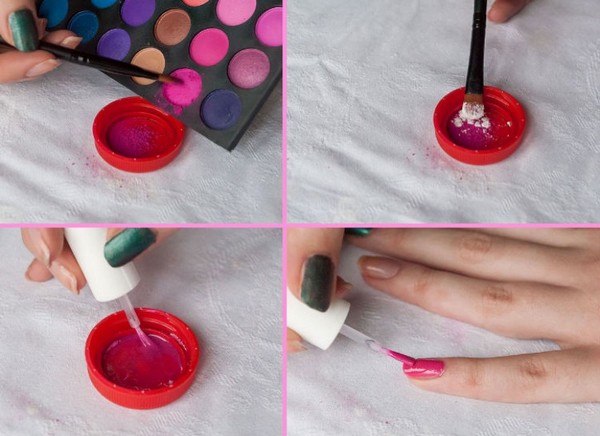
Creating a matte nail polish can be easily done by adding some eye shadow on your nail polish. You can try different colors until you can discover the perfect shade that you want.
Originally posted by minq
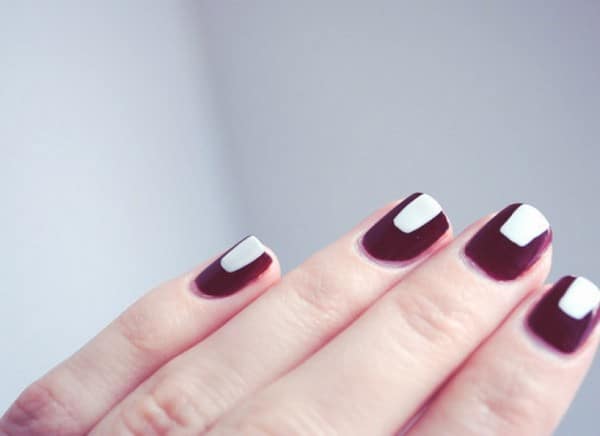
This is one of the easiest nail designs that you can do as a beginner. First, apply a dark colored nail polish then put a single swipe of white nail polish on the top center on the nails.
Originally posted by buzzfeed
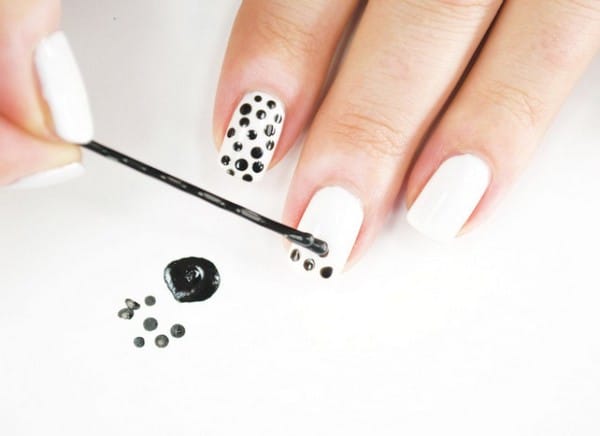
Making polka dots can be done with a toothpick or the point of a pen. However, using the tip of the Bobbi pin is very effective. All you have to do is dip the tip of the pin in the nail polish and place the polka dots on your nails.
Originally posted by minq
This crescent design is accomplished with the use of stickers. First, you need to apply a base coat and let it dry. Stick the stickers on the lower part of the nails then apply another color. Remove the stickers and you’re done.
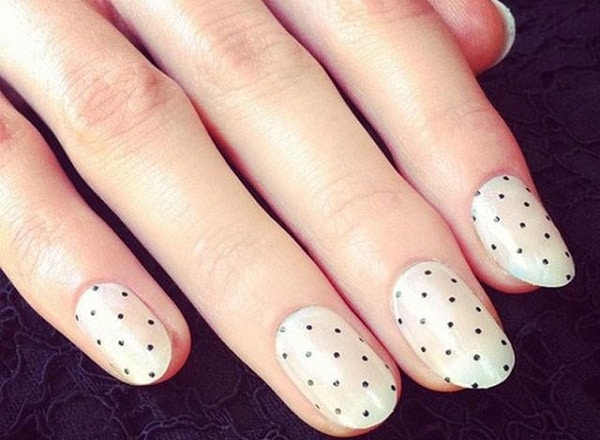
Use a white nail polish for your base coat. Use a toothpick and draw the dots on your nails.
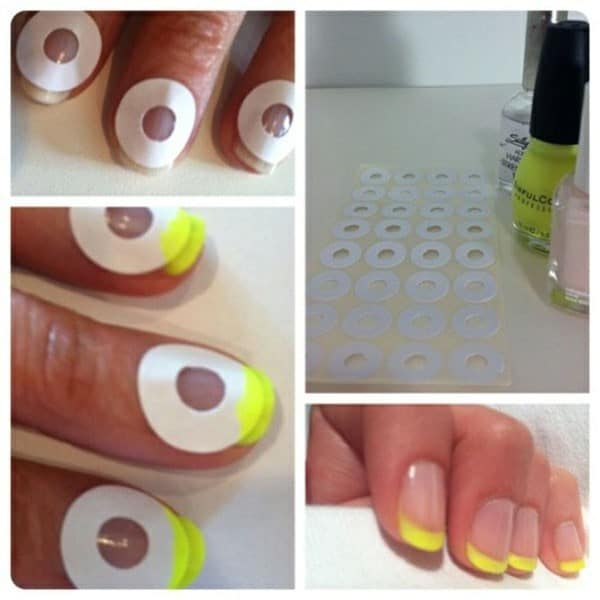
Place round stickers on your nails and paint a yellow color on the tips, looks especially cool on oval nail shapes.
Originally posted by stylemotivation
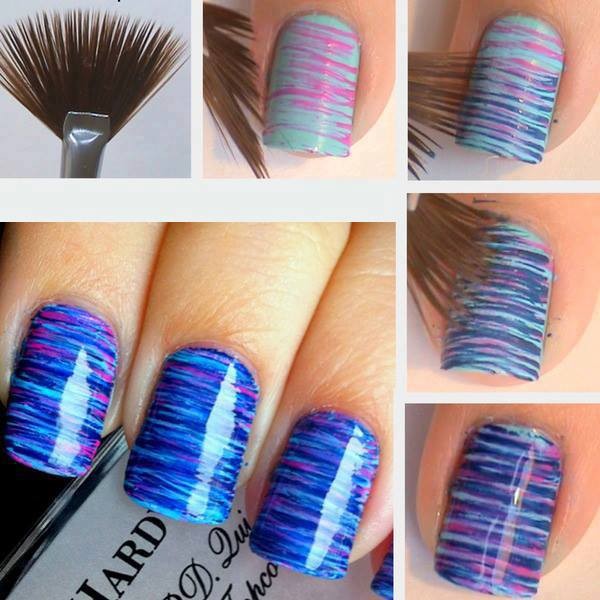
Apply your base coat and let it dry. Use a fan brush in order to obtain very fine stripes. Dip the fan brush in various colors and spread them over to the nails horizontally.
Originally posted by diyncrafts
Paint your nails with white and let it dry. Once it has dried up, apply a clear coat. While wet loop the cotton string on your nails. Use a cotton bud and design some lights in it.
Originally posted by fashionsy
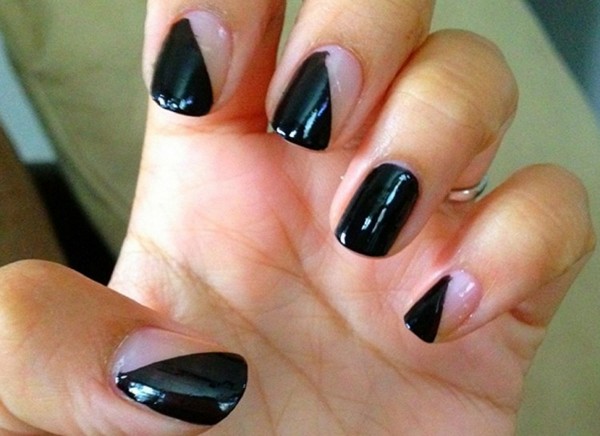
Apply a clear coat and stick a piece of gold leaf on the base of the nails. Finish it up with a black nail polish.
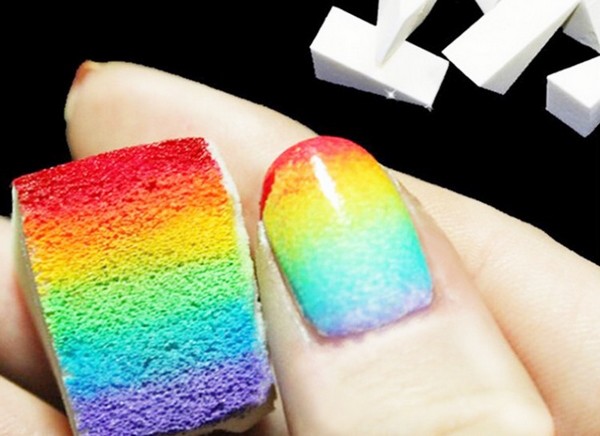
Obtaining a gradient can be done easily. All you need are two nail polish colors, sponge, and a toothpick. First, paint your nails with the lighter color. Then, pour the two nail polishes next to each other. Use a toothpick in swirling them together until they meet. Lastly, use a sponge and dab it onto the paint. Dab this sponge into the nail and move it up and down gradually.
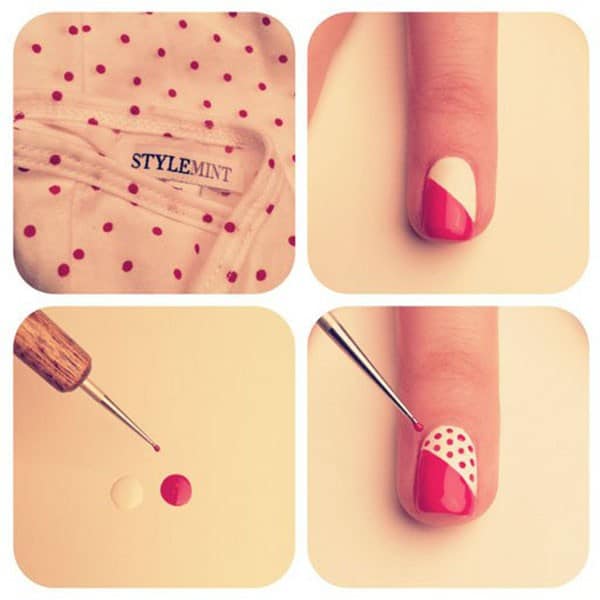
Apply the white polish on the nails. Then paint a red polish diagonally. Use a pointed pin in designing the dots.
Originally posted by diyncrafts
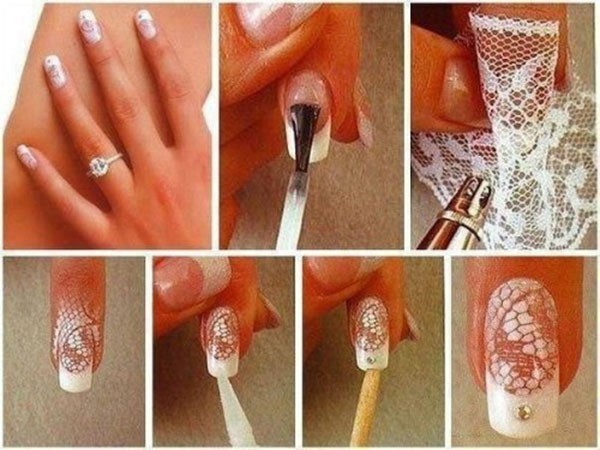
First, apply a clear coat on your nails and paint the tips with white. Wrap your fingers in a lace then dab your nail polish on a sponge. This may look very complicated, but it can be done easily.
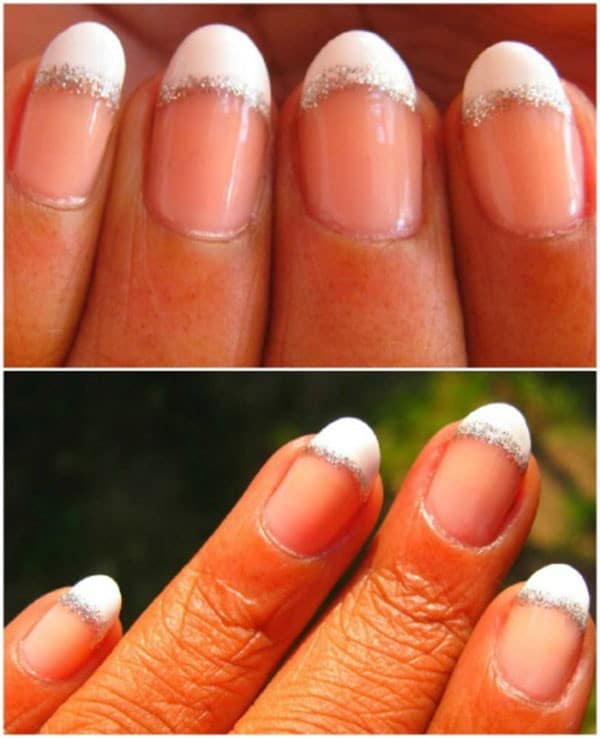
If by chance you’ve made some mistakes in creating your French mani then there’s a perfect way to hide it. Use a glitter pen and draw a line between the white and the pink polish.
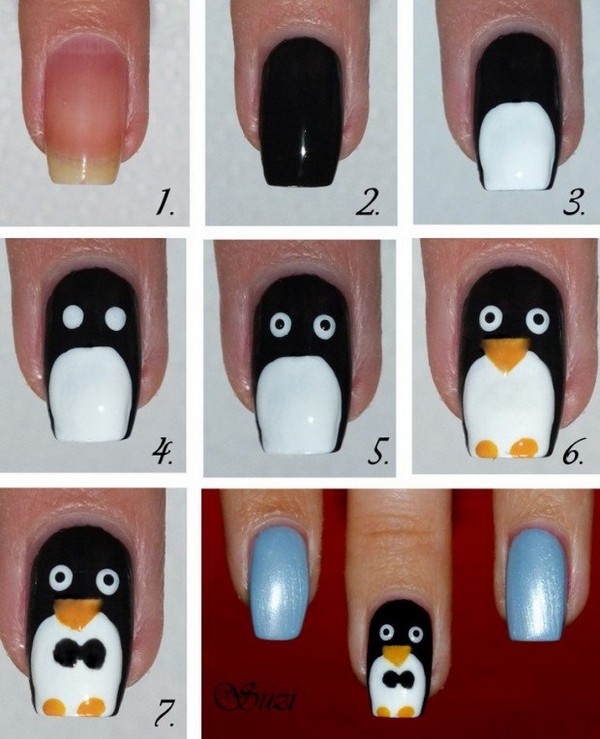
First, use a black polish in painting your nails. Use a paintbrush and a white nail polish in drawing a tall semi-circle shape. Create two white circles and place two small black circles inside. Use a bright orange polish in creating the beak and the feet. Create a black bow at the center.
Originally posted by makeup-tutorials-beautiful
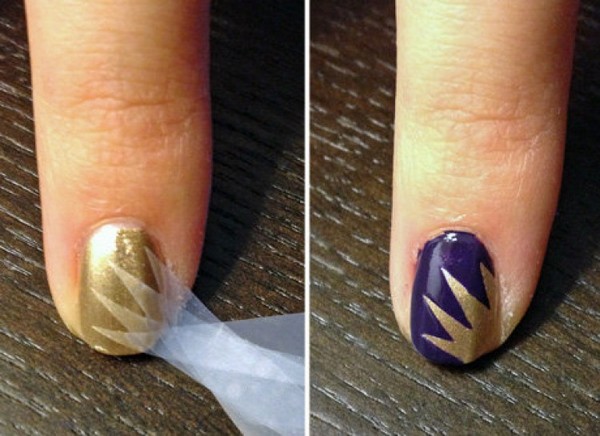
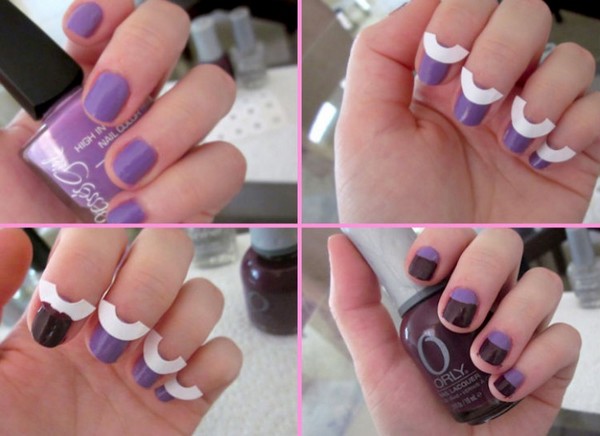
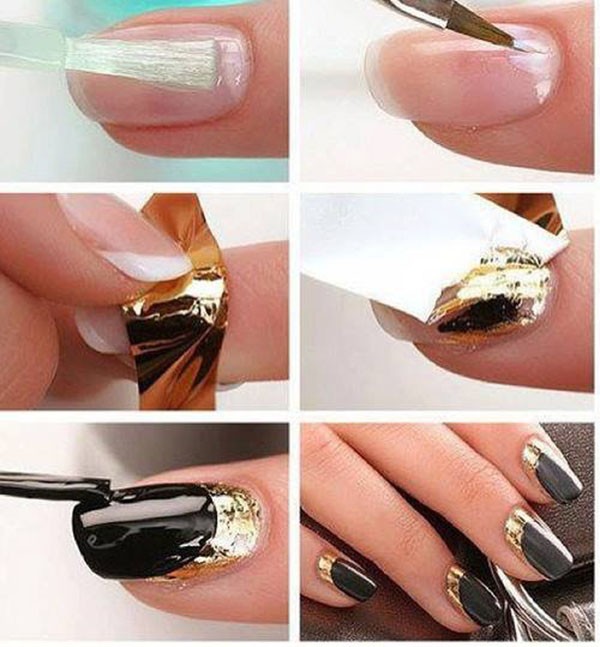
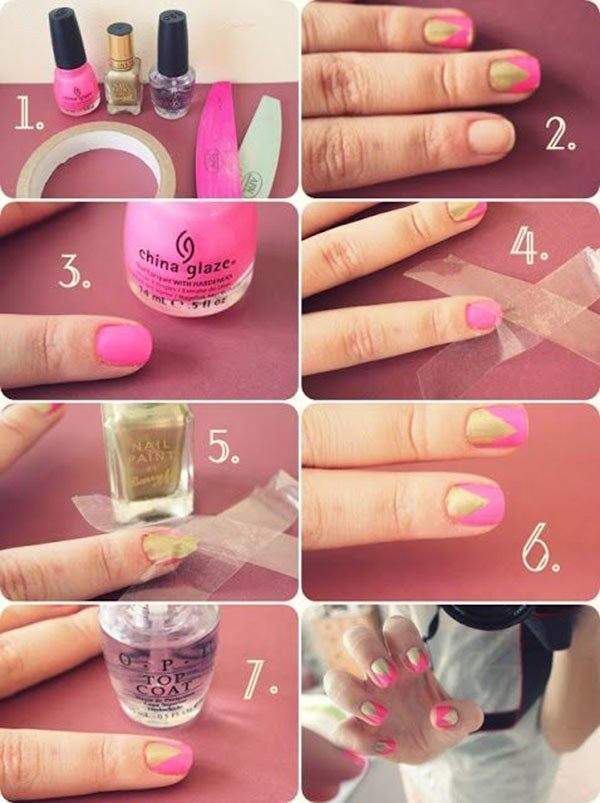
Use the pink nail polish for your base coat. Stick the scotch tape on your nails to form a small triangle on the base of your nails. Then, apply the gold nail polish. Finish it up with a topcoat.
Originally posted by vikraman
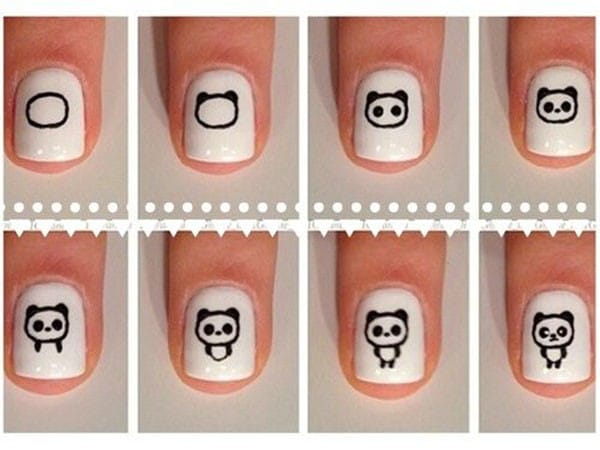
Apply a white nail polish on your nails. You need a pointed brush in drawing the panda on each nail. Draw the face first then the body.
Originally posted by minq
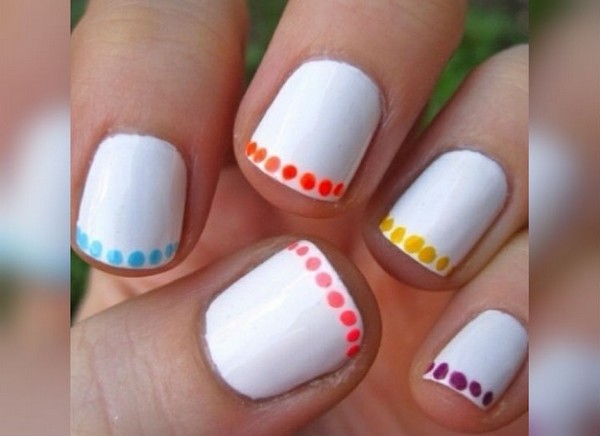
Apply a white nail polish on the nails. Use a Bobbi pin and apply different colors of dots on the tips.
Originally posted by minq
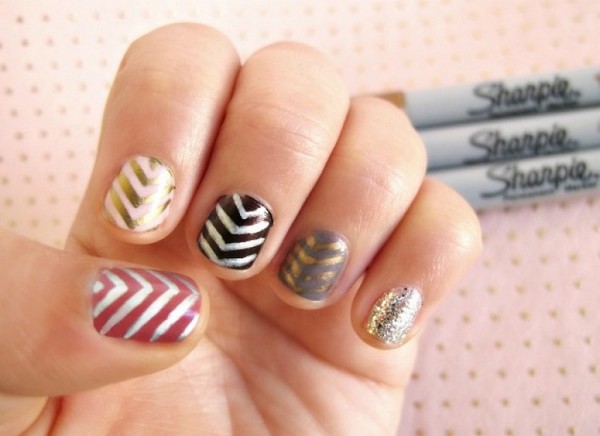
It is not necessary that you have to use nail polish all the time. In this design, sharpies are being used in order to create these fabulous designs. It looks very colorful!


No comments